Pages

Subscribe Twitter Facebook
Showing posts with label Breakfast. Show all posts

Monday, September 22, 2014

Having Fun With Sourdough


Well this past week I have been babysitting a lot....
Like constantly.  Feeding every 8 to 12 hours... keeping close supervision
On my baby, because I want it to grow strong, and get bigger...

Well my baby is healthy, and active, and has already given birth!!!

My baby is a beautiful bubbling Sourdough Starter....

Yes, yes, I know... your not as excited as me, but this is an awesome thing
To behold... something from my childhood years growing up in Alaska.

Sourdough pancakes were Devine, and people carefully cared for their Sourdough
 starters for years.  Some Starters could be traced back a hundred years or more.

I finally created a successful Starter that has great taste, and is active and happy
Living in my kitchen in a mason jar on my stove.  It gets fed and bubbles away
Happily, waiting to become bread, or English muffins, or pancakes or waffles...

I have been going back through my cookbooks, and familiarizing my self with
The world of Sourdough... It has Been a fun adventure.

My first try out of the Sourdough Jug was Crockpot Sourdough Bread.
It baked in my 2.5 quart Crock pot, and it turned out really flavorful.
Definitely a first attempt  success!!!

This is the website that helped inspire me to give Sourdough
A try again, and also taught me that I can use my crockpot to bake bread!!!


This website also had the recipe and instructions for starting my 
Sourdough Starter. Here is the link below.


This is what a Starter looks like when it is happy and well fed!
This is from the link.  

Mine looks pretty much the same, only it lives in a mason jar...

Now what to do with all the extra Starter.... A person can only eat so much 
Bread, pancakes and waffles....

The fun part about this bread, is that I am making it from the no knead artisan method.
So even if you don't have a kitchen Aid, or have bulging muscles, you can still
Make fantastic bread with very little effort....

You just have to be very patient and let the bread just sit in a warm place...
Hanging out, bubbling away for 12 to 18 hours.... 
It takes another couple hours in second rising and baking.
But it really is easy and forgiving on the time table.

I'll post more links as I make my way on my Sourdough journey....

If anyone local wants some starter, just let me know..

I have plenty, each and every day, bubbling away....


~ Brat~


Tuesday, September 9, 2014

Chai Banana bread


This is a picture of me and my oldest on a visit to
One of our favorite coffee and tea shops.
I usually get my loose leaf Chai Tea from them each year
Around this time of year in preparation for fall.


I was writing a blog post on my favorite food blogs today,  
And I stumbled on this recipe...

It sounds amazing, and no matter how we try to plan,  we always have
 ripe bananas that need to be baked or cooked or used in 
smoothies, sitting in our kitchen.

I will have to get cardamom before I can make it, but as soon as I do
I will be baking up a loaf of this wonderful sounding bread.

I love Chai flavored tea, so I'm sure I will love this recipe.


Link to recipe


The fall season is almost here....

Baking will begin, and pots of tea will be warming and ready to savor....
Hmmm, which teacup to choose to start the season off right???


Enjoy

~ Brat~


Thursday, August 28, 2014

Pancakes


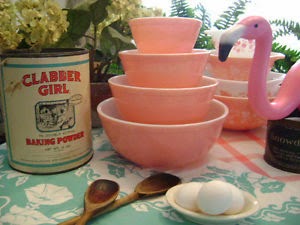
Old Pyrex mixing bowls a thing of beauty


Pancakes

1 C. Flour
2 T. baking powder
2 T. Sugar
½ t. Salt

1 egg
1 cup milk
2 T. oil

*optional
1/2 tsp. Cinnamon
1/4tsp. Nutmeg
1tsp. Vanilla.


Mix dry ingredients in larger bowl.
Mix wet ingredients together and add to dry ingredients, mix lightly. 
Batter will rise a lot. Let set for a few minutes. 
Stir down, and use.

If batter gets too thick, add some milk to thin it.


I usually double or triple this for us.  

You can add anything to the batter.... My daughters usually add chocolate chips, since they are not too fond of syrups. 


This recipe is provided by a very good friend of mine and we have been making them for about 20 years now.... it is on a recipe card, taped to the inside of my baking cabinet, old and faded with time, yet where it is always accessible...  


These beautiful bowls were on eBay and sold for $175.00
Beautiful set of nesting bowls.  Made someone a happy baker!


My daughter Stephanie is the pancake expert in our family... since she got married, I don't think anyone has made them at our house since.  We go over to her house so she'll make them for us.

Breakfast for dinner happens a lot at our house. Since I am not a huge breakfast person and hate to cook in the morning, I make it an effort to just cook breakfast for dinner several times a month.


Enjoy!

Friday, August 22, 2014

Banana Bread


This is My favorite recipe for banana bread.
I have been using it for years.
  The sour cream makes it nice and moist.


Banana Cream Bread
(Green Acres Old Fashion Cookery Book)

Combine in a large mixer bowl with beaters:
1 1/3 cup oil
3 cups sugar
4 eggs
6 ripe mashed bananas
1 cup sour cream
1 Tb. Vanilla
1 ½ tsp. salt

Mix until smooth and add:
4 cups unbleached flour
1 ½ tsp. baking soda
Mix until blended,-do not over mix.
Add 2 cups chopped walnuts (optional)

Divide into greased and floured loaf pans. 
Fill 2/3 full and sprinkle with sugar to form a sugar
Crust.  Put in preheated 325F and bake 40-60 min. 
Loaves are done when top is crowned, lightly browned
And tests clean with a toothpick.  Remove from oven
and cool in pans for 5 min before turning out on cooling
racks.  This bread is best made with Very, Very Ripe
fruit.  Cool and wrap and age in refrigerator or freezer
at least one day before serving.

Yield: 2 large loaves or 4-6 mini loaves.


It is really hard not to cut into these when you take them out of the oven.  It is worth the wait, the bread gets more moist as it sits wrapped in Saran wrap.
I love to slather it with butter or better yet with cream cheese....
So very delicious, and a great way to use up over ripe bananas, and who doesn't find themselves with over ripe bananas from time to time.

I hope you enjoy this recipe as much as my family does.

~ Brat~


Wednesday, August 20, 2014

Over Night Steel Cut Oats


Our family loves breakfast... 
And they say It is the most important meal of the day.  
Most days you will find in our refrigerator a container of steel cut oats, cooked and ready to be reheated.  I usually make a big batch once a week, and we reheat it all week long.  It is really simple to make over night, and it comes out perfect each time, and doesn't burn, or stick to the pan, or over cook....


Steel Cut Oats (not quick) 


Follow the ratio on container, 
I know my container says 1 cup oats to 4 cups water, 
this should be pretty much universal, but I have seen the ratio of 1 cup SC-Oats to 3 cups water also so check your package.
I usually use my 5 quart pot, and make a double batch of this, 
so I use 2 cups of Oats to 8 cups of water.  

Bring your water to a boil, and add the steel cut oats, and then stir.  
Turn off heat, add a dash of salt (I like Sea Salt), 
put a lid on the pot and leave over night on the burner of the stove.


I usually make this Saturday night around 10 or 11pm before we go to bed, 
and it is still slightly warm when we wake up around 7 or 8 am. 
Just give it a stir, and it is ready to serve.
It will be done in as little as about 4 hours if needed.

Both my husband and daughter like to eat their oatmeal on the 
savory side, by frying an egg or two to a nice medium runny center 
and putting them on top of the oatmeal with some salt and pepper. 
It is good with a few strips of bacon or sausage this way too.


Now me,  I have to be different, I only like my grits on the savory side, 
I like and prefer the sweet side of oatmeal for breakfast. 
 I like to put some brown sugar and a dash of nutmeg on top and let 
it melt all over it.  It is just the perfect way for me. 
You don't need any butter since the Steel cut oats are really creamy and 
don't need it, but if you are a Butter lover  I suppose you could put a 
dab on top too.


Additions to Flavor your Oatmeal:
Choose your favorite flavors, and make your bowl to your liking, 
for a group of hungry people, you could have an assortment of toppings, 
and let everyone be creative and add their favorites before 
they eat or reheat. 

Bananas, chocolate chips, berries, raisins, chopped apples, coconut, 
Pie filling, brown sugar, nutmeg, cinnamon, flavored extracts, Maple syrup, Molasses, coco powder, apple sauce, walnuts, pecans,
 slivered almonds, peanuts, marshmallows and Graham cracker crumbs,
Jelly(strawberry, raspberry, blackberry, marmalade)
Cranberries, canned peaches, dried apples, Dried Apricots,
 Milk, creamer, half and half, almond milk, chocolate milk ....
Cooked and crumbled bacon, cooked sausage, fried eggs, hot sauce....


~~~~~~~~~~~~~~

Helpful Tip:
If you stored all the topping ingredients in mason jars in a specific place in your cupboard, it would become a breakfast station for the family to help theirselves to make a healthy and yummy hearty breakfast.  It would encourage them to start the day in a healthy way.
(Non perishable/refrigerated ingredients)

~~~~~~~~~~~~~~


I made Pumpkin Pie flavored oats this winter, by adding a small can of pumpkin 
and pumpkin pie spice to the pot with 1 cup of oats and 4 cups of water, and that was just like eating hot pumpkin pie... I put a little vanilla coffee creamer on top and some brown sugar...
 it was heavenly...


I am pretty sure it would also taste good with warm Apple pie filling added
 to it....and some cinnamon and brown sugar sprinkled on top...
Might have to try that...


I hope that you enjoy your breakfast Oatmeal... 
Let me know if you try it and if you have any more favorite toppings that I might have forgotten to mention.


~Brat~


Tuesday, February 4, 2014

Orams Donuts


People from all over the country come to get these donuts. 
They are famous here in our little community, and people come to
Get some whenever they come back home to the area.
Once you have eaten them, you'll understand how special they are.


There are many kinds of donuts to choose, cake or raised, filled or glazed.... 
but the big demand is for the cinnamon rolls.


Some people call them cinnamon rolls, some call them sinkers, some call them hubcaps.... but we called them delicious, especially when made into
 French Toast.


My darling daughter made us breakfast last week for dinner one night, and she made us French Toast using the amazing cinnamon rolls from Orams.


They were really good, and was a great use for the day old pastries that 
we had.  It would have been a shame to waist them so we tried
Them in a new way.


She sliced the rolls in half, dipped them in beaten eggs and milk with a 
dash of cinnamon and nutmeg.  Cooked them on a medium hot skillet until nicely brown.  We drizzled a little syrup over the top of it 
(you don't need much since they are sweet enough).

They were very yummy and smelled Divine while being cooked.

If you have a chance you should try them.... you won't be disappointed.

Go early in the day, they open at 5:00 am. And the cinnamon rolls are frequently all gone by about 10:00am. They are closed on Sunday.

Hope you enjoy!


~ Brat ~


Monday, January 20, 2014

Cinnamon Rolls From The Bread Machine


Before they are cooked

Christmas morning is the best time for cinnamon rolls...

This year, I went to the pantry and found my bread machine so that I could  make some hot, sweet, delicious cinnamon rolls for breakfast.

Ready to go into the oven...

It was so easy to do with the bread machine... I just measured all the ingredients into the machine, programmed it to be done at 7 am, and went to bed.  I awoke to the wonderful smell of yeasty goodness known as cinnamon roll dough.

All that was left to do, was roll it out, spread it with butter, cinnamon, and sugar, cut it into rolls and bake it!  Oh, ya.... I also had to wait about an hour for them to double in size. 

In our home we have a love of anything maple, so on top of the hot cinnamon rolls, I put a generous amount of maple glaze... Yumm....


Heavenly and amazing Maple Glazed Cinnamon Rolls...


Recipe from my bread machine instruction manual.

The recipe says it makes 24 rolls, but we like ours big and soft, so I cut them into only 14 rolls, that are the prefect size for a lazy morning with a pot of coffee or tea.

Cinnamon Rolls From the Bread Machine (2 lb.size of dough) 

Put the ingredients into bread machine in the order given.  
Set time delay for dough cycle if you want it ready in the morning.  
Make sure that the yeast sits on the top of the ingredients, protected in a well of flour so that it doesn't get wet and activate early.

1 egg plus enough water to measure 1 1/2 cups
1 tsp. Lemon Juice
1/2 cup sugar
1/3  cup oil
3 1/2 cups of bread flour
1 cup of whole wheat flour
1 1/2 tsp. salt
2 tsp. dry yeast


Filling Ingredients:
1/2 to 1 cup of butter slightly melted.
1/2 to 1 cup brown sugar packed tightly
3 Tb. Cinnamon

Mix together sugar and cinnamon, set aside.

Glaze ingredients:
1 1/2 cups powdered sugar
milk (as much as needed to get the right pouring consistency)
2-3 tsp. maple extract.


Roll out your dough when done in the machine to about 16x24 inch rectangle on a lightly floured surface.

Spread melted butter all over the dough.

Sprinkle, and spread the brown sugar and cinnamon mixture over the dough.
( this is where the fluctuation of the amount of sugar comes in, I didn't think it had enough, so I added more to cover it nicely)

Roll the dough up into a long roll, working carefully to keep the filling tightly inside the roll.  Go slow and carefully.  At the final edge, pinch the seem together as much as possible to help the rolls not unravel when in the processes of growing to double their size.

I divided the roll in two equal lengths, since I was putting them into 2 -9x13 pans, and wanted them to cook evenly.

After dividing the two sections, I sliced the two sections into 6 or 7 separate rolls.  Place the cut rolls, cut side down into a well greased or buttered pan to double in size in a draft free warm place. 
I turned my oven on 200 degrees for about 15 min, then turned it off an placed the pans in the oven to keep warm.  It took a little over an hour for them to grow to perfection.

Bake at 350 degrees for 25-35 min until nice and golden brown, and they smell done... you will smell the wonderful scent of cinnamon rolls wafting through the house...

put your powdered sugar in a bowl, add extract, and enough milk to get a nice drizzle consistency.   (You might add more powdered as needed if you add too much milk, this always happens to me, I have to keep adding until it is just right, and if it doesn't have enough of a maple taste, add more maple, taste, add, taste add....) 
As soon as the rolls come out of the oven, drizzle the glaze over both pans of rolls.... allow to cool about 10 to 15 min so that the glaze will have time to set a bit and soak into the rolls...


And just one more photo of these beauties, just because...


Hope you make these and enjoy them as much as we did!

And don't forget to brew up a nice big pot of Coffee or Tea... It will be a perfect combination.


Powered by Blogger